...
The BD-base script will split your terminal into panes and start each of the services needed for the Brown Dog DTS. This provides a useful and convenient way to view the logs of running services in panes.
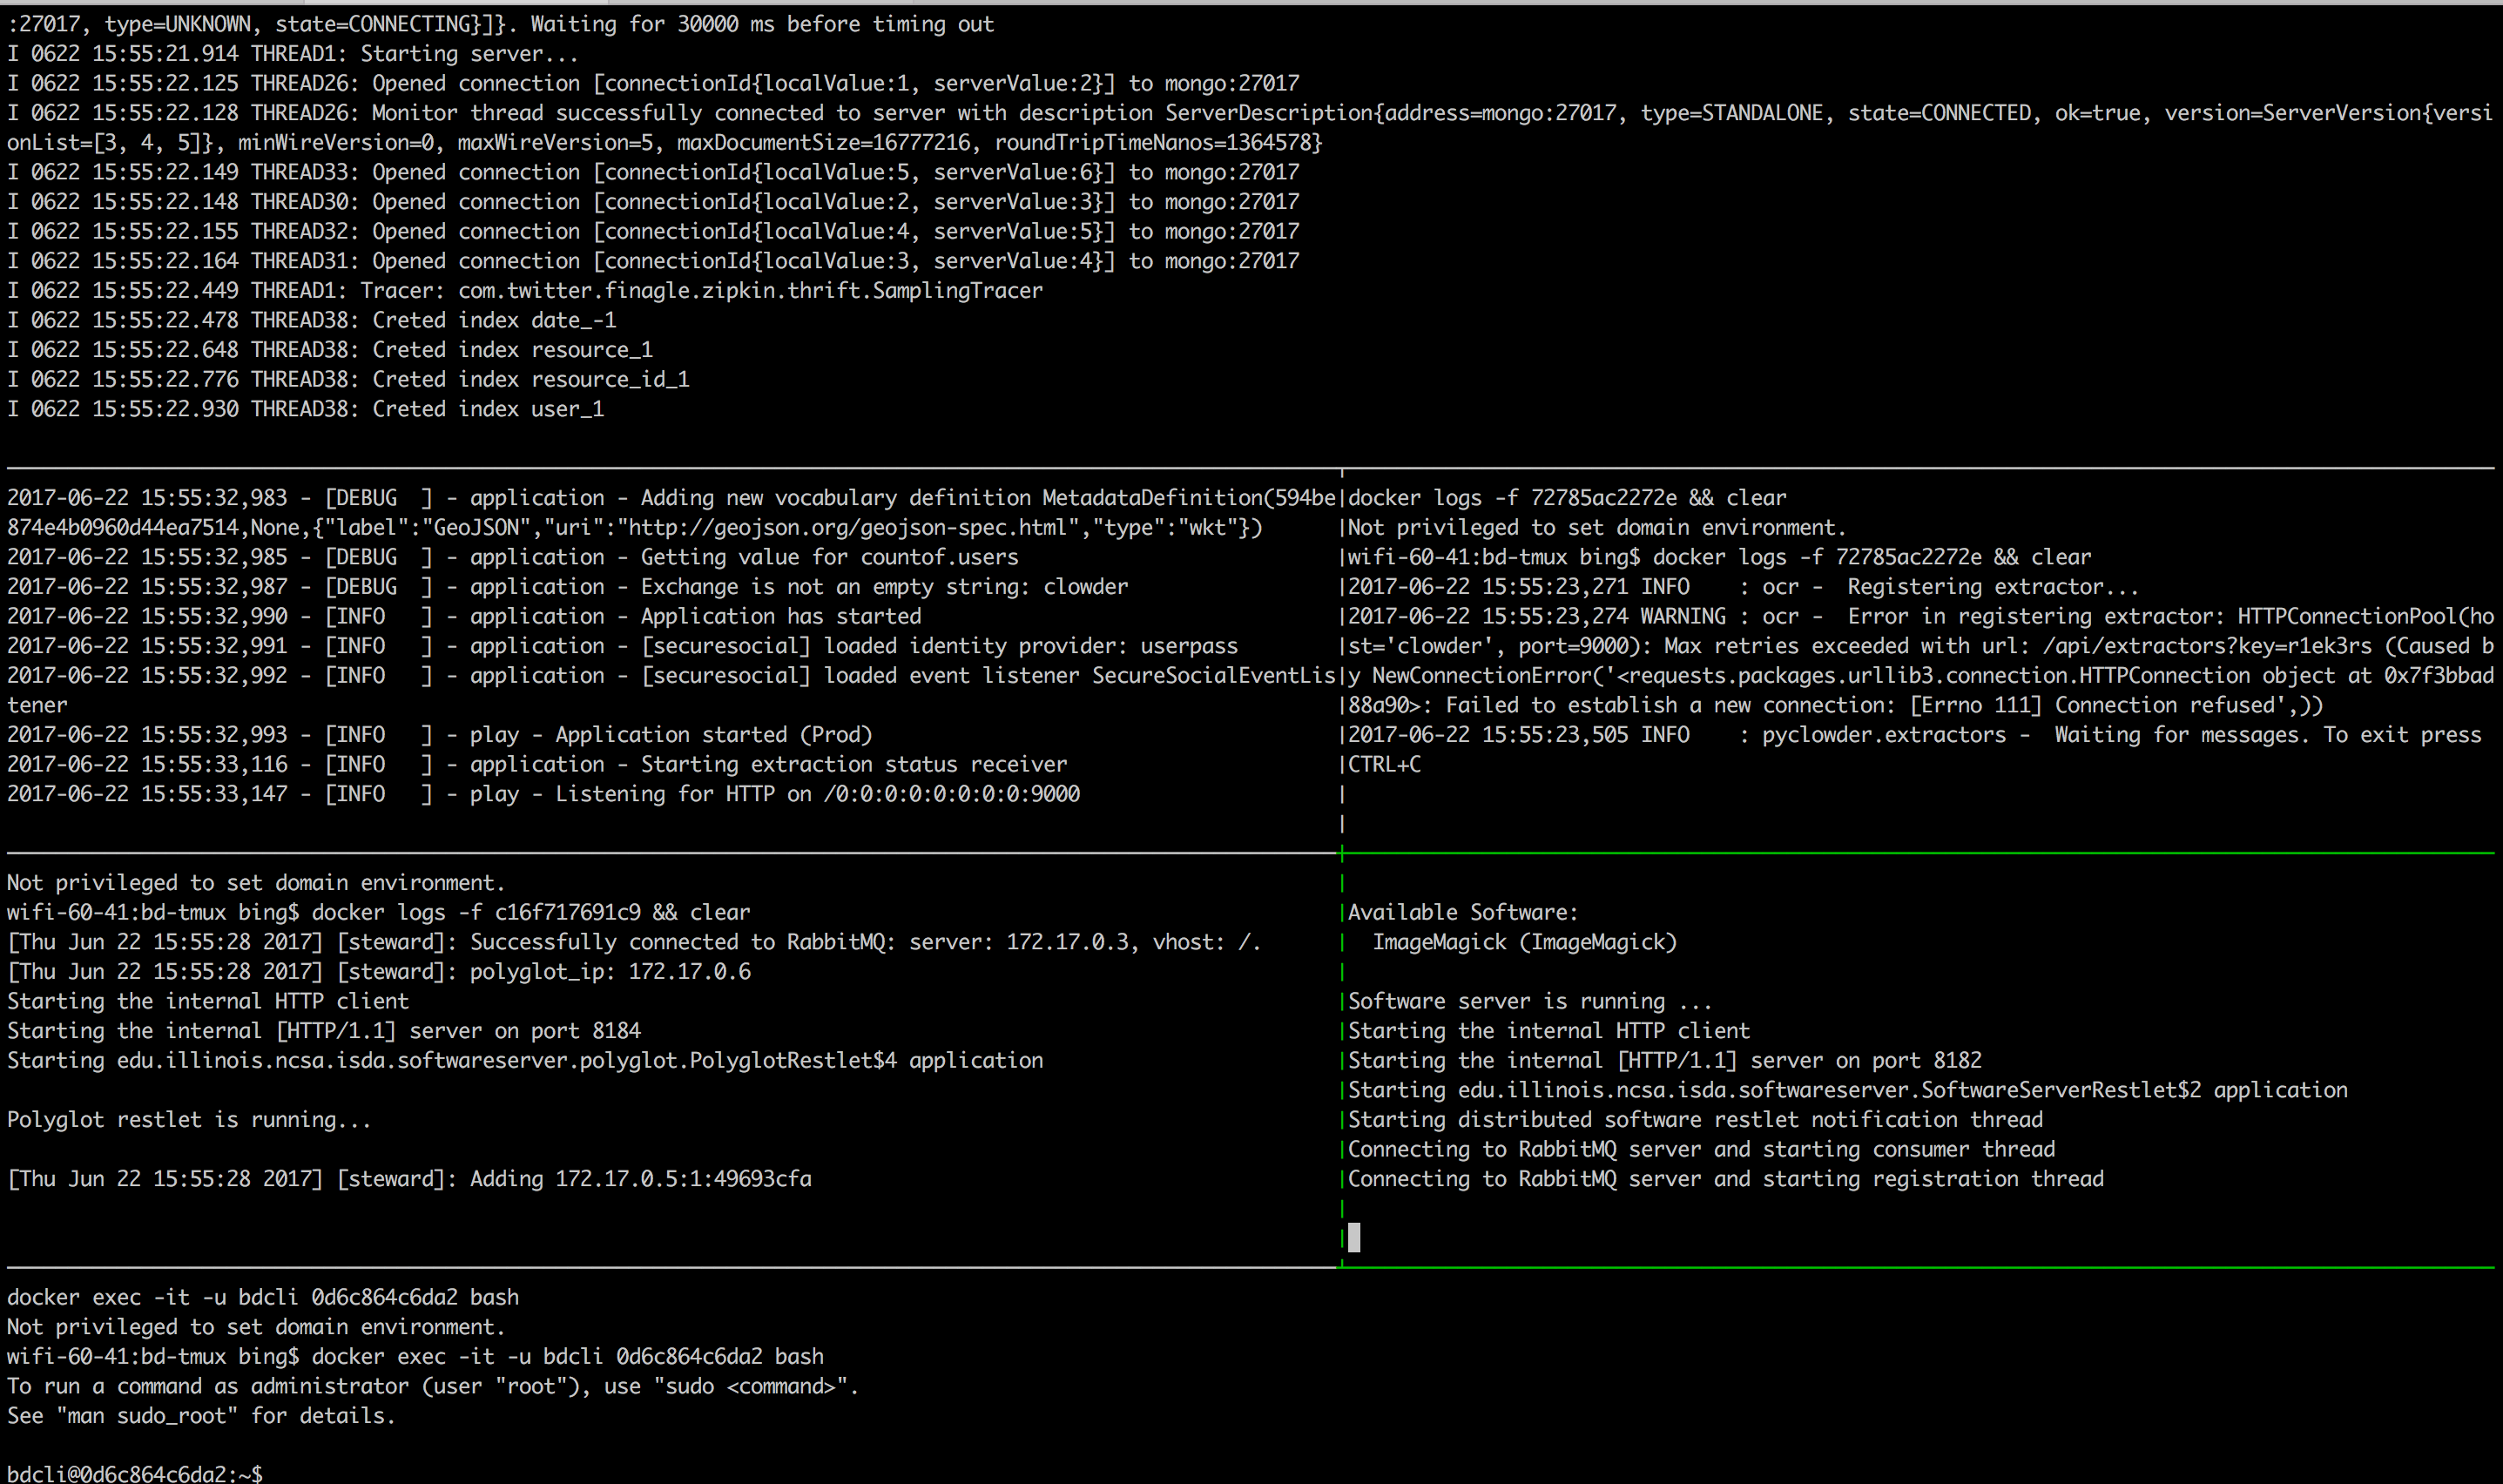
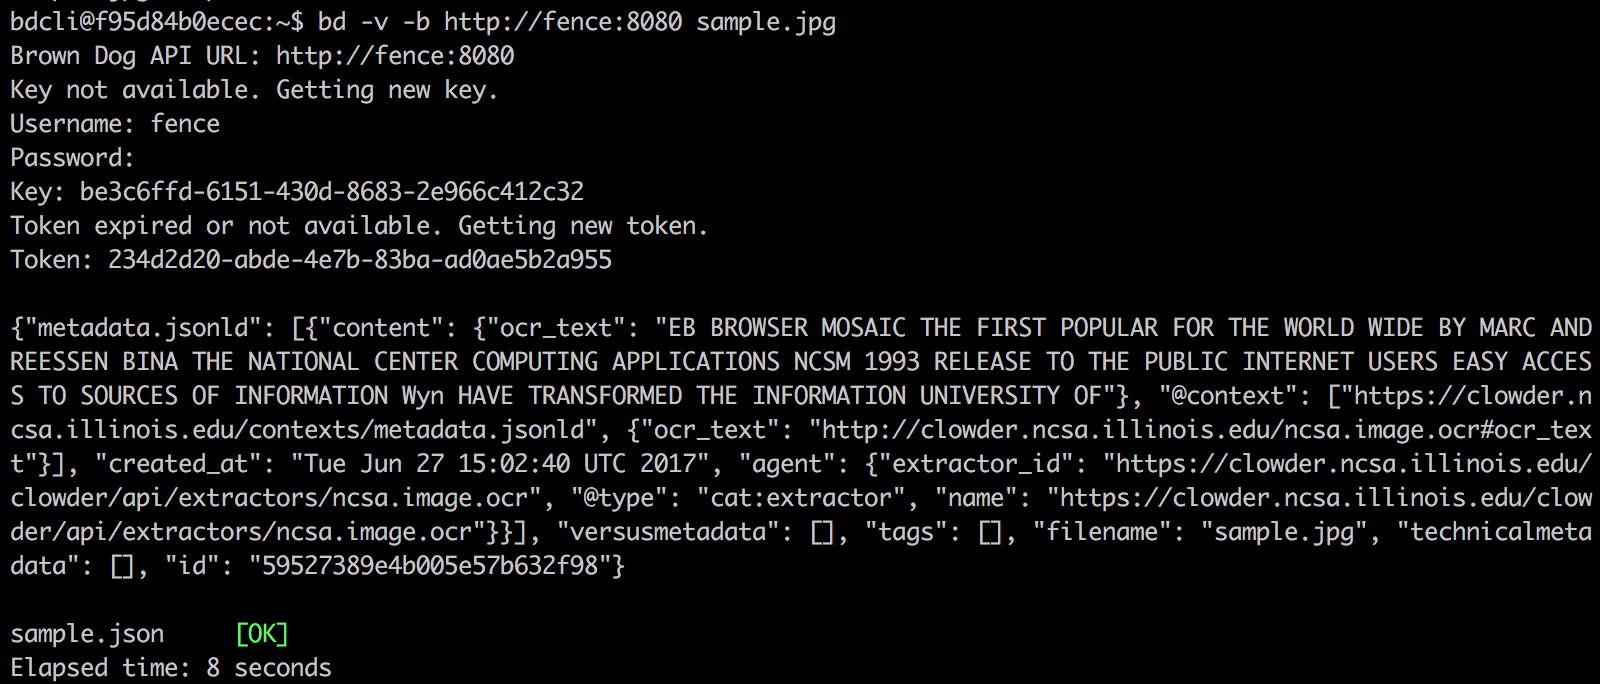
Users can switch between panes using Tmux commands. The panes are as follows: Fence (top), Clowder (middle-left), example extractor (middle-right), Polyglot (middle-left), example convert (middle-right), and the BD CLI (bottom). Users In the bottom pane, users can run BD-CLI commands to interact with the Brown Dog Data Transformation Service (username: bd, password: browndog):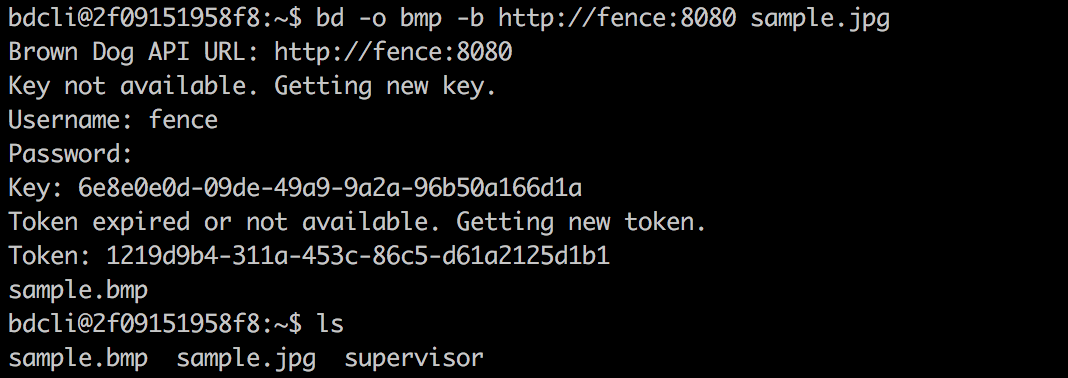
CTRL-b <arrow key> will navigate panes.
Exit the bd-base session by typing CTRL-b then typing :kill-session will exit the bd-base session. Note, there .
NOTE: There is a .tmux.conf file included in bd-base. If you paste copy this file into your home directory before starting up a bd-base session you will be able to navigate panes via the mouse and end the session by typing CTRL-b then CTRL-c.
...
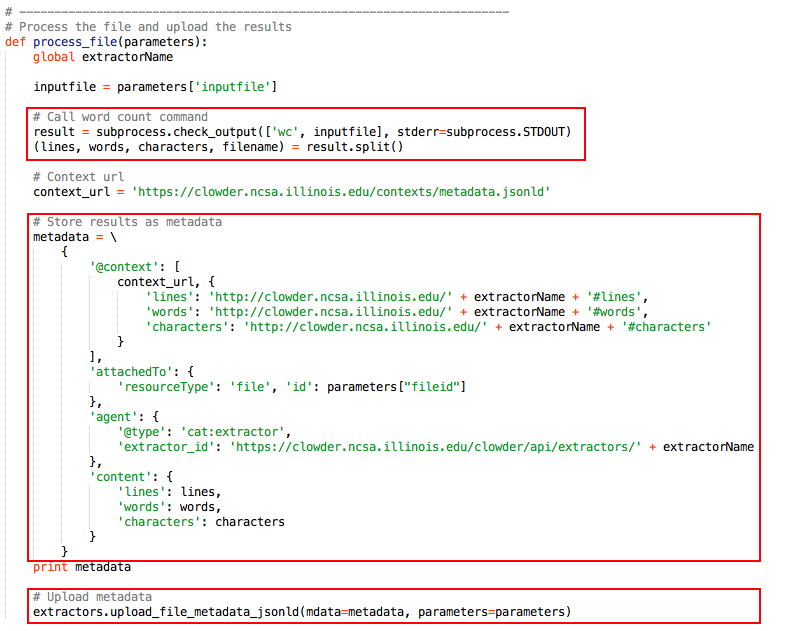
Make changes to extractors.py (main program). Consider the process_file method as the main method of an extractor and accordingly it needs to contain the main logic. You can call other methods in your python code from this method after importing necessary modules into this file.
3. Edit extractor
...
_info.json
This file contains metadata information about the extractor in JSON-LD format. Update all relevant fields as needed.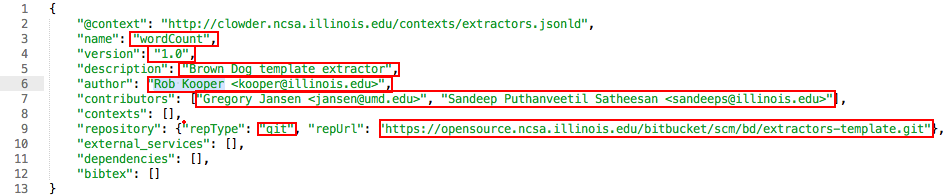
4. Configuration
...
Parameters
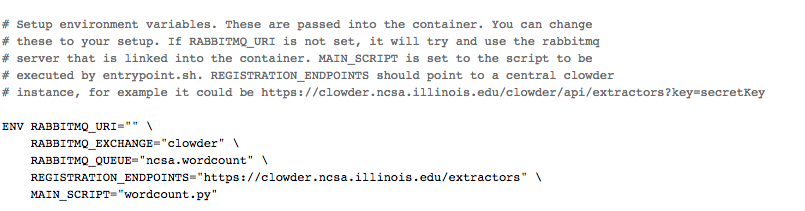
Extractors obtain the configuration information details required to connect to RabbitMQ, Clowder, etc., either from command-line arguments or environment variables. If you look at the Dockerfile inside the termplate extractor directory you can see some of the environment variables being set. For the purpose of running your extractor using BD Development Base, you DO NOT have to change anything.
Note: The remaining part of this section is relevant ONLY if you want to run your extractor against another production instance at some other location. Otherwise, you can skip and continue reading the next section.
If you are planning to run your extractor using Docker, you will need to modify the Dockerfile to set the environment variables as required.
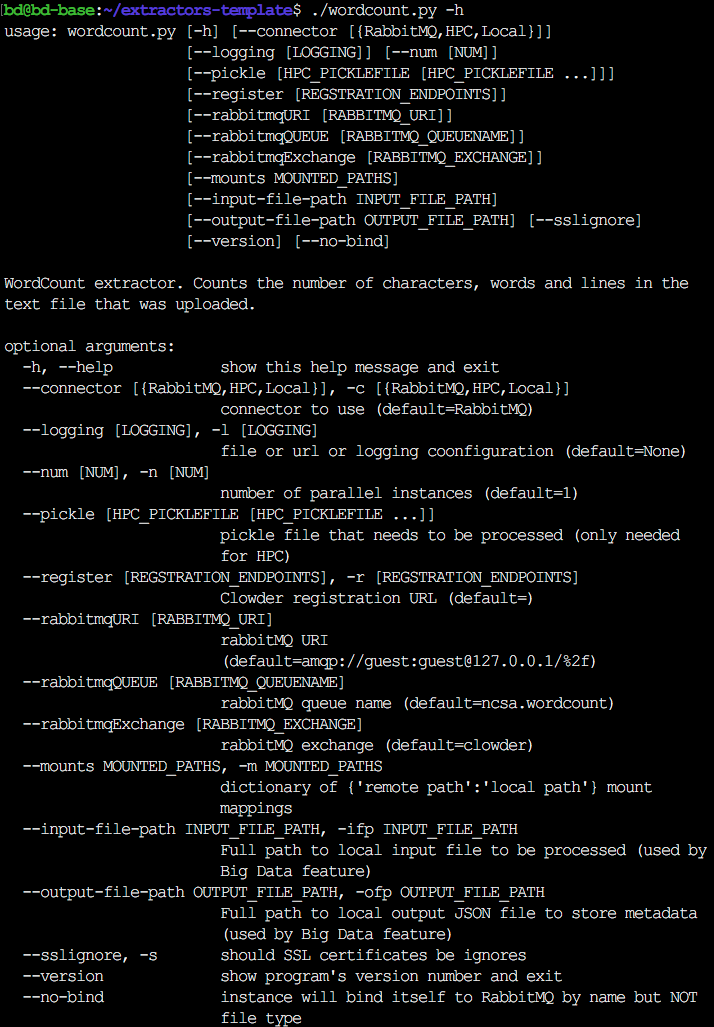
Otherwise, if you run your extractor as a standalone program (outside of Docker), you will need to set the relevant command-line arguments. You can get a list of these parameters by running your extractor with the help option (-h, --help).
5. Edit the Dockerfile
Update the Dockerfile to install your software dependencies, provide necessary instructions in Dockerfile using the RUN command. You will need to add a line in Dockerfile to switch to the root user (USER root) for getting proper permissions. For e.g., to install ImageMagick package using apt-get, add the following commands to Dockerfile:
...
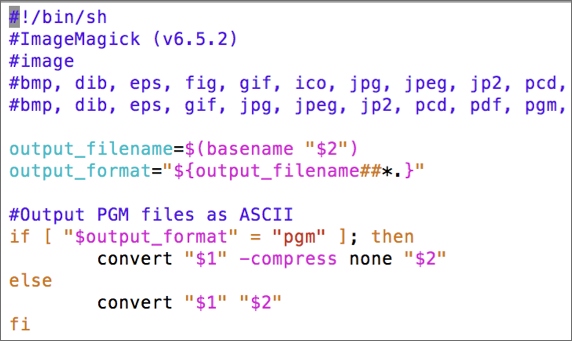
This script will be used by the Software Server to run the tool and carry out any requested conversions. The example script ImageMagick_convert.sh that uses ImageMagick tool to convert images between different formats is shown below. The conversion script follows a specific header and is written as comments:
- First line is the shebang line
- Second line contains the name of the converter followed by the version (if any)
- Third line refers to the type of the data that it can convert
- Fourth line contains a comma-separated list of the input file formats accepted by this converter
- Fifth line contains a comma-separated list of the output file formats that this converter can generate
- This is followed by the actual code that does conversion.
2. Edit the Dockerfile
...