...
- Create a Windows VM in Nebula.
- Choose the instance boot source to be "Boot from image (create new volume option)".
- Choose appropriate VM flavor to get sufficient disk size and number of CPUs
- Choose appropriate security and networking
- Launch instance
- Associate a Floating IP address
- Login to the VM and enable remote desktop connection
Install the Extractor
...
- Install
...
instructions: https://docs.python.org/2/using/windows.html
make sure “C:\Python27\” is on path for system user (start->right click on “computer”->properties->advanced->environment variables), edit PATH if necessary
For now, use Python 2.7 instead of Python 3.x for compatibility reasons.
2. Install pip
download file “get-pip.py” from https://pip.pypa.io/en/latest/installing.html#id7
open cmd as admin
python get-pip.py
after install is done, type pip in the cmd prompt, if “not recognized” error, add “C:\Python27\Scripts" to path for system user (like described in 1)
3. Install pika, requests
pip install pika
pip install requests
4. Install pyclowder
...
- ArcGIS
- Available on the WebStore for free
- Instructions with ArcGIS work for the install
- ArcGIS also includes the Python that it expects to use
- Get the path to ArcGIS as it will be used in the next step (hereafter referred to as <ArcGIS PATH>)
- Add Python, pip, and 7zip to the Path
- These work for Windows 10, future versions of Windows may change how the path is altered
- On the control panel search for Edit the System Environment Variables, click the Environment Variables button
- The lower half of the new window has the system variables, choose Path and then the Edit button
- Click the New button, to add a new section to the path
- Add <ArcGIS PATH> to the top of the list of path, and <ArcGIS PATH>/Scripts right beneath it (this will use the Python installed with ArcGIS before anything else)
- Add "C:\Program Files\7-Zip\" to the end of the path.
- Quote the value due to the space in Program Files
- Update pip
- `python -m pip install -U pip`
- Install pika and requests
- The version is important as newer versions introduced errors
- `pip install pika==0.11.2`
- `pip install requests==2.18.4`
- Install Git Bash to run git from the command line
- Download and install from gitfromwindows.org
- Install pyclowder version 1
- The extractors have not been updated to the latest pyclowder yet
- Set up a Repositories directory in home directory, and change into it
- From Git Bash run `git clone https://opensource.ncsa.illinois.edu/bitbucket/
...
If you need to make any changes to pyclowder during development, you will need to rerun setup.py install.
5. Install any additional software/packages required
6. Ensure Clowder and RabbitMQ are running [This is not required if Clowder is not running in the same VM]
In clowder\conf\play.plugins, 9992:services.RabbitmqPlugin should be enabled (line 3 may be commented out by default).
RabbitMQ needs a topic exchange called clowder - this can be created via RabbitMQ browser UI (default is http://localhost:15672/)
The extractor config.py should include the rabbitmqURL (default is "amqp://guest:guest@localhost:5672/%2f")
...
...
- cats/zzpyclowder1.git`
- Change into the zzpyclowder1 directory
- `python setup.py install`
- Install the extractor
- Use the version from Clowder, rather than Browndog
- From Git Bash run `git clone https://opensource.ncsa.illinois.edu/bitbucket/scm/cats/extractors-bd-cz.git`
- This puts the scripts into place to be run
- The config.py for each extractor will need to be updated to point to the proper RabbitMQ URL and Clowder registration endpoints
- For browndog.ncsa.illinois.edu use:
- RabbitMQ URL: amqp://<USER>:<PASSWORD>@rabbitmq.ncsa.illinois.edu:5672/clowder[-dev]
- Clowder Registration: https://browndog.ncsa.illinois.edu/clowder[-dev]/api/extractors?key=<KEY>
- If running everything locally then start RabbitMQ and Clowder locally, and the default values in config.py will likely work
- For browndog.ncsa.illinois.edu use:
- Test that the extractor works
- Run it from the cmd prompt and watch the outputs to be sure it is working properly.
- Also advised to upload some files to Clowder and observe that the extractor is receiving, processing and uploading the results back correctly.
Build Windows Service [Uses NSSM]
Create a simple bat file to run extractor and save it in some directory that is easily accessible:
Code Block language bash cd /d <full_path_to_extractor_directory> python Landsat7mosaic.py
Download and install NSSM. At the time of writing this document, the latest stable version is 2.24.
Make sure that NSSM is added to your PATH for easy access from the command prompt.From Windows Command Prompt, run the command to install a new service. You will need to provde administrative privileges to execute this command:
Code Block language bash nssm install <service_name>
Here the <service_name> is the unique name of the service. This is different from the display name that shows up when you open the Windows Service Manager.
- Fill in the details of the extractor and the service settings in various tabs
- In the Application Path, put the path of the bat file that was created in step 1. Startup directory will be the directory containing the bat file by default. Provide any arguments if needed.

- Add the service details including the display name

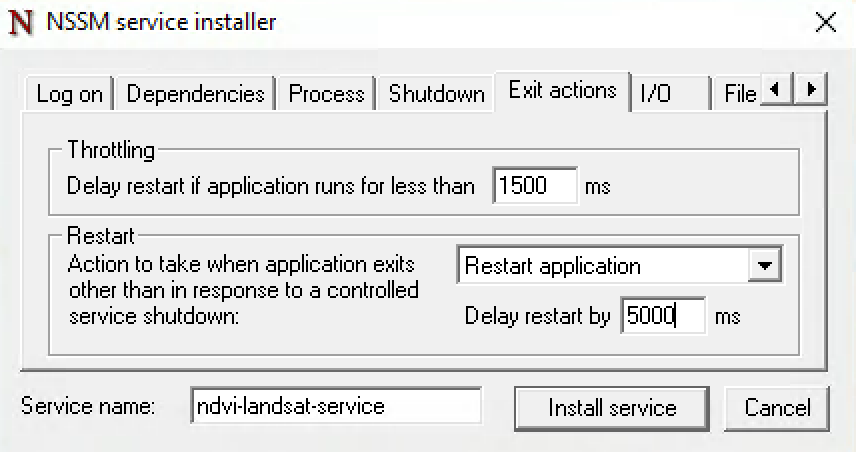
- Set exit actions. Optionally, provide a delay to restart the service.
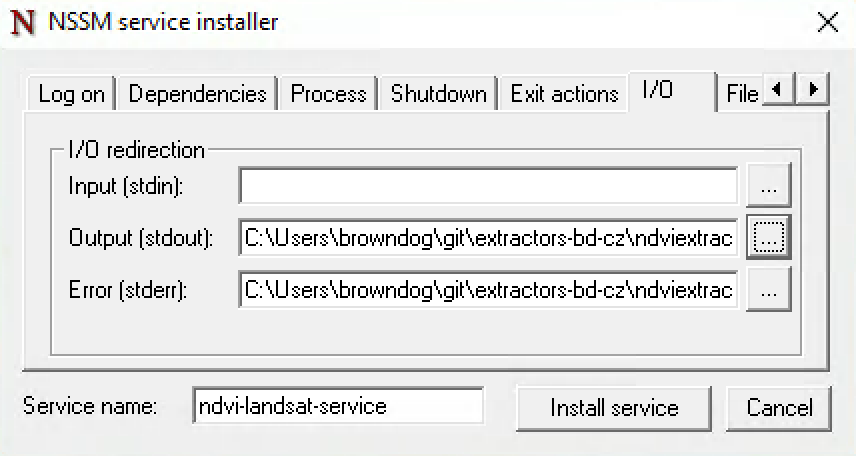
- Optionally, choose log files to write stdout and stderr
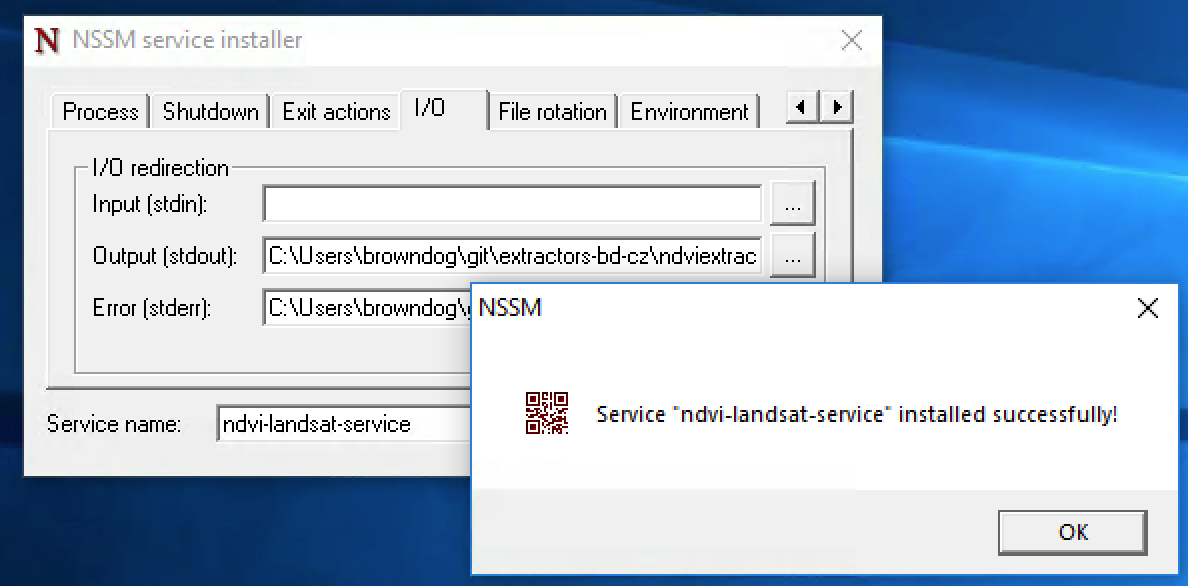
- If needed change any of the other settings and press "Install Service" button
Start the service from Windows Service Manager
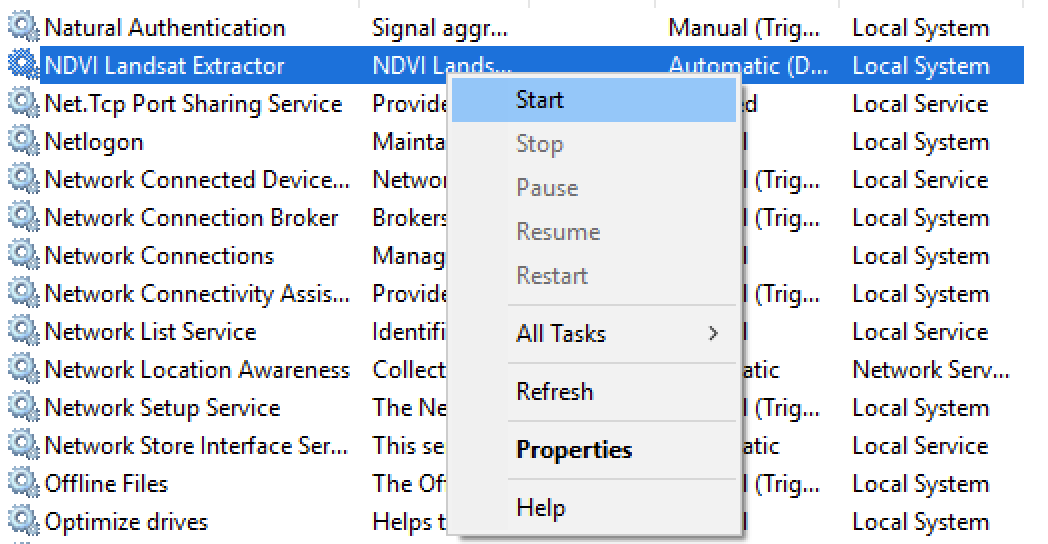
Or you can use the "nssm start <service_name>" command. Other commands needed to manage the service are listed below: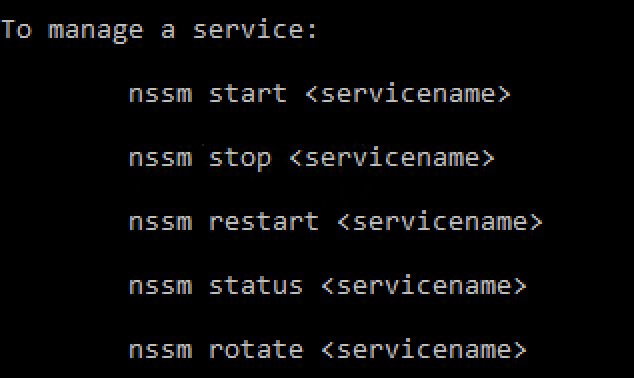
For example,Code Block nssm.exe restart terex-floodplain- Make sure that the corresponding extractor queue was created in RabbitMQ. Done!
- In the Application Path, put the path of the bat file that was created in step 1. Startup directory will be the directory containing the bat file by default. Provide any arguments if needed.
...