Contents
Setup XML
Getting eclipse to validate DFDL Schemas using its XML validation capabilities requires some configuration. Without this you will get hundreds (at least) of XML and XML Schema validation errors from the daffodil code base.
There are two files of interest to this located in your dfdl git repository:
- daffodil-lib/src/main/resources/eclipse-xml-catalog.xml
- daffodil-core/src/main/resources/eclipse-settings.zip
IMPORTANT: These settings and catalog will change the configuration of eclipse substantially, and may not be suitable for projects other than Daffodil, so save your existing eclipse install directory and workspace's .metadata/.plugins/org.eclipse.core.runtime/.settings directory, if you are trying to share it across more than just Daffodil. You'll likely need to split out into two distinct workspaces and two distinct copies of eclipse.
Import XML Catalog
- Open Eclipse.
- Select File -> Import -> XML -> XML Catalog.
- Browse to and select daffodil-lib/src/main/resources/eclipse-xml-catalog.xml. Click OK.
- Close Eclipse.
Import Eclipse Settings: Windows
- Open Windows Explorer and open the folder of your local dfdl git repository.
- Navigate to the following file: daffodil-core/src/main/resources/eclipse-settings.zip
- Copy this file.
- Navigate to the location of your Eclipse workspace.
The eclipse settings zip file contains a .settings directory to be restored in your Eclipse workspace's ".metadata/.plugins/org.eclipse.core.runtime/.settings" directory.
To accomplish this:
- Navigate to ".metadata/.plugins/org.eclipse.core.runtime/".
- Here, paste the eclipse-settings.zip file.
- Right-click eclipse-settings.zip -> 7 Zip -> Extract Here
- You may be asked if you'd like to replace the files. Select yes to all.
Import Eclipse Settings: Linux
Open a Terminal and cd to your local dfdl git repository. Likely "/home/username/git/dfdl" or "~/git/dfdl".
$ cd ~/git/dfdl
$ cp daffodil-core/src/main/resources/eclipse_settings.zip ~/workspace/.metadata/.plugins/org.eclipse.core.runtime/
$ cd ~/workspace/.metadata/.plugins/org.eclipse.core.runtime/
$ ls -la
The above commands essentially copy the eclipse_settings.zip file to the "org.eclipse.core.runtime" folder of your workspace.
The 'ls -la' command should show you that "org.eclipse.core.runtime" contains the zip file and a hidden ".settings" folder.
Now we need to unzip the file and replace the contents of the ".settings" folder.
$ unzip eclipse_settings.zip
You will be asked if you want to replace. Enter "A". This will replace all of the files.
Close the Terminal.
Test It Out
With the settings and XML Catalog above, you can edit DFDL Schemas, and get support from Eclipse.
For example,
- Edit core/tests/AA.dfdl.xsd in eclipse. Notice that it does not use xmlns="http://www.w3.org/2001/XMLSchema", which is the usual name space for XML Schema. Rather, it uses "http://www.ogf.org/dfdl/dfdl-1.0/XMLSchemaSubset" which provides much more DFDL-oriented schema validation.
- Note that the file extension ".dfdl.xsd" is the standard way to identify a DFDL schema file.
- Change one of the dfdl:inputValueCalc properties and misspell the property name. Save the file and you should see a validation error.
- Validation using the DFDL XML Schema Subset URL will validate short form and long form DFDL annotations, and enforce DFDL's subset of XML Schema.
Contrarywise....
- Edit core/tests/AH.dfdl.xsd in eclipse. Notice that it uses xmlns="http://www.w3.org/2001/XMLSchema", which is the usual name space for XML Schema.
- Note that the file extension ".dfdl.xsd" is the standard way to identify a DFDL schema file.
- Change one of the dfdl:inputValueCalc properties and misspell the property name. Save the file and you will NOT see any validation error.
- Change one of the attributes of the dfdl:defineVariable element, such as remove the name attribute and put in a ref="foo" attribute. Save, and you should see a validation error.
- Validation using the standard XML Schema URL will NOT validate short form DFDL annotations, nor will it care if you put a long form annotation element named dfdl:foobar. But if you do get the name of a DFDL annotation element correct, then it will validate the properties on that annotation element.
Setup Linked Resources
Open Eclipse.
You need to describe where you cloned the daffodil repository. To do so, perform the following:
- Go to Window -> Preferences -> General -> Workspace -> Linked Resources
- Under 'Defined path variables', click 'New...'
- Enter DAFFODIL_ROOT as the Name
- Enter the path to the daffodil repository in Location
- Click OK twice.
Unicode Setup
Windows
A US install normally doesn't default to a Unicode friendly environment. One of the features of the Scala programming language is that it is completely unicode aware.
But, to make a USA windows default install of Windows itself, and Eclipse unicode friendly you have to take a few steps.
- Open Eclipse.
- From the top menu bar Select Window -> Preferences
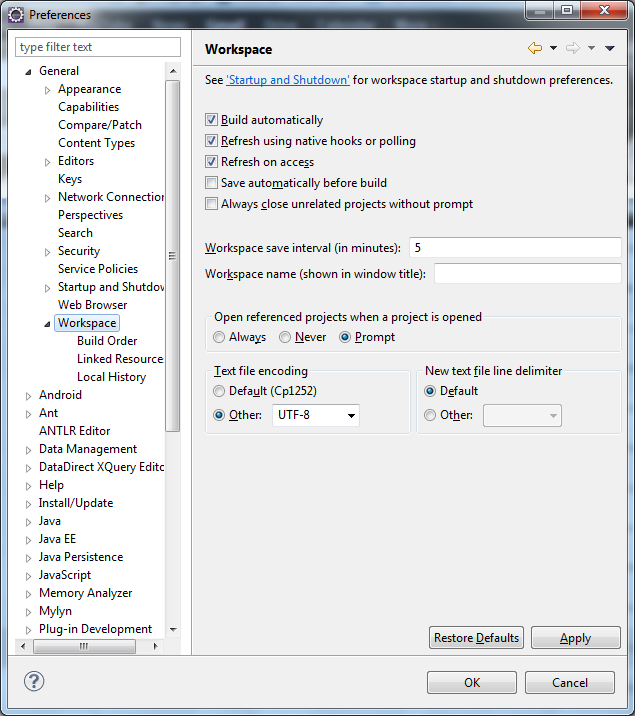
- A dialog box will pop-up. In the left pane navigate to General -> Workspace.
- Under 'Text file encoding' choose Other and select UTF-8 from the drop down as pictured below:
Click Apply.
Do not exit this dialog as of yet.
From the left pane select General -> Editors -> Text Editors
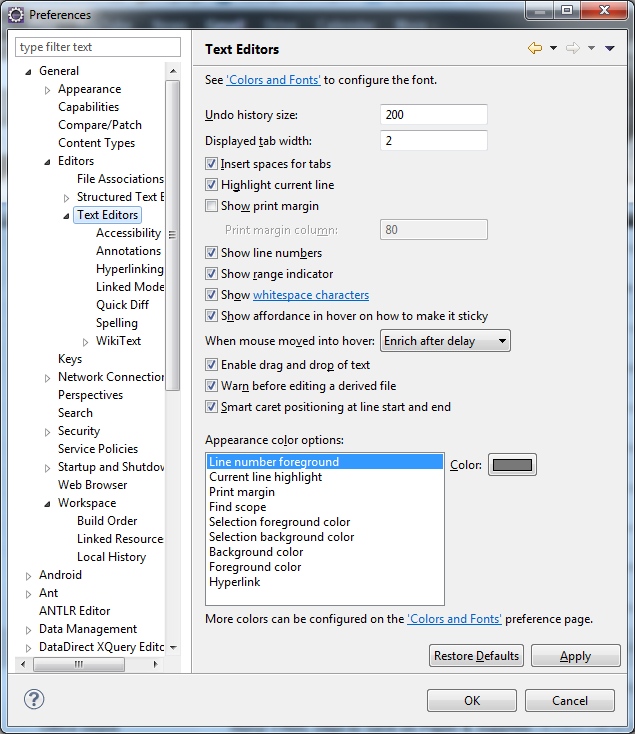
At the top there will be a hyper link titled 'Colors and Fonts'. Click this.
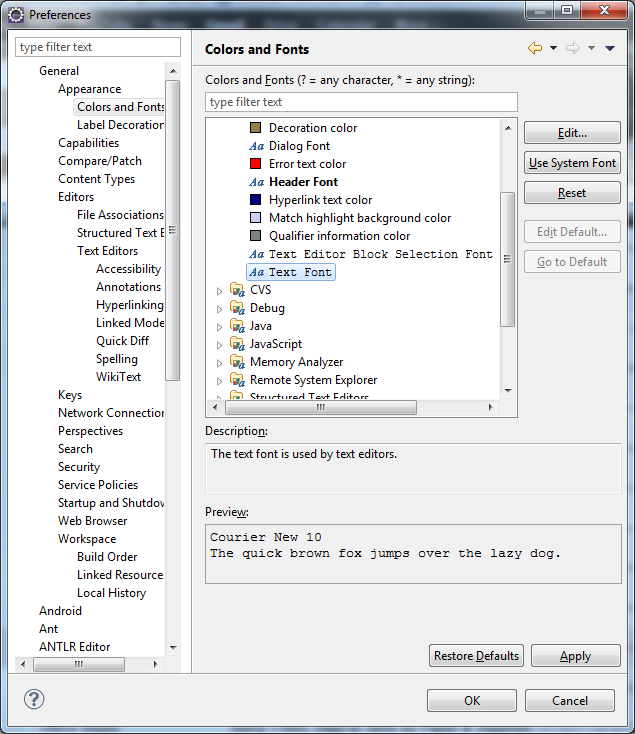
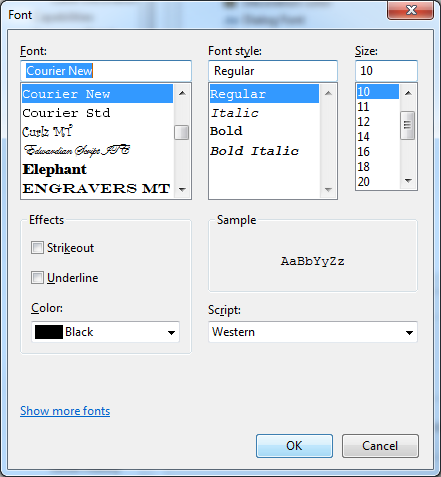
For the text font (bottom of list usually), change it to Courier New by clicking Edit and selecting Courier New. This font has many of the glyphs for unicode characters in it.
Click OK.
Click Apply.
Click OK.
In the Package Explorer. Select all of the daffodil projects. (Click the first daffodil project. Hold Shift. Click the last daffodil project. Release Shift.)
Right-click the first daffodil project.
Select Refresh.
Close Eclipse.
Lastly:
- From the Windows Start Menu, click Control Panel.
- In the Control Panel select Windows Update.
- Here you will want to make sure to show all hidden updates as you will need to install one of them if you haven't already.
- Choose the Japanese language pack. Install it. Reboot
Linux
On Linux, UTF-8 and good unicode fonts are the default. Nothing to do here.