...
Create and save extractor_info.json using any text editor in your source directory. This file contains the metadata about the extractor that you are creating. Please fill in the relevant details about the extractor in this file. This document follows the JSON-LD standard. A template extractor_info.json has been provided below for reference. As you can see, you can fill in the details like name, version, author, contributors, source code repository, docker image name, the data types on which the extractor will work, external services used, any dependent libraries, BibTex format citation to a list of publications that the extractor is referring to, etc. An example extractor_info.json can be found here:
Code Block language js theme Confluence linenumbers true { "@context": "<context root URL>", "name": "<extractor name>", "version": "<version number>", "description": "<extractor description>", "author": "<first name> <last name> <<email address>>", "contributors": [ "<first name> <last name> <<email address>>", "<first name> <last name> <<email address>>", ], "contexts": [ { "<metadata term 1>": "<URL definition of metadata term 1>", "<metadata term 2>": "<URL definition of metadata term 2>", } ], "repository": [ { "repType": "git", "repUrl": "<source code URL>" } ], "process": { "file": [ "<MIME type/subtype>", "<MIME type/subtype>" ] }, "external_services": [], "dependencies": [], "bibtex": [] }- Download the Docker Compose file from
- https://opensource.ncsa.illinois.edu/bitbucket/projects/CATS/repos/pyclowder2/raw/docker-compose.yml
You can also use curl command to download it from a terminal:
Code Block language bash theme Confluence curl https://opensource.ncsa.illinois.edu/bitbucket/projects/CATS/repos/pyclowder2/raw/docker-compose.yml?at=refs%2Fheads%2FBD-2226-add-docker-compose-file-to-pyclowder2 --output docker-compose.yml
- https://opensource.ncsa.illinois.edu/bitbucket/projects/CATS/repos/pyclowder2/raw/docker-compose.yml
Start up the Clowder services stack (Clowder, RabbitMQ, MongoDB, and ElasticSearch) by running the following command from the directory containing the downloaded docker-compose.yml file. This may take a few minutes when running for the first time:
Code Block language bash theme Confluence docker-compose up
Create and save a Dockerfile in your existing source code directory. This can be done using any text editor in your computer. The content of the Dockerfile needs to be the following, where should replace my_python_program.py and my_main_function with their actual names:
Code Block language bash theme Confluence FROM clowder/extractors-simple-extractor:onbuild ENV EXTRACTION_FUNC="my_main_function" ENV EXTRACTION_MODULE="my_python_program.py"
- If there are any Python or Linux packages that are required by your code, please add them to two files named requirements.txt and packages.apt in the source code directory. Each package entry should be added to a separate line in these files.
Now, create the Docker image for your extractor using the command below. Please note that there is a dot (.) at the end of the command. You will need to open a terminal client and change to your Dockerfile directory using the cd command before running the command below (this will also install the Python packages from requirements.txt and Linux apt-get packages from packages.apt):
Code Block language bash theme Confluence docker build -t my_extractor .
In the terminal, you should be able to see the logs of the services that are part of the Clowder stack.
From another terminal window, you can now run your extractor using the following command:
Code Block language bash theme Confluence docker run -t -i --rm --network clowder_clowder my_extractor
You should be able to see the logs related to the starting extractor in this terminal window.
- You can always test your python code before wrapping it as an extractor. To test your built extractor, you will need to sign up and create an account in your local Clowder instance. Please follow the steps below:
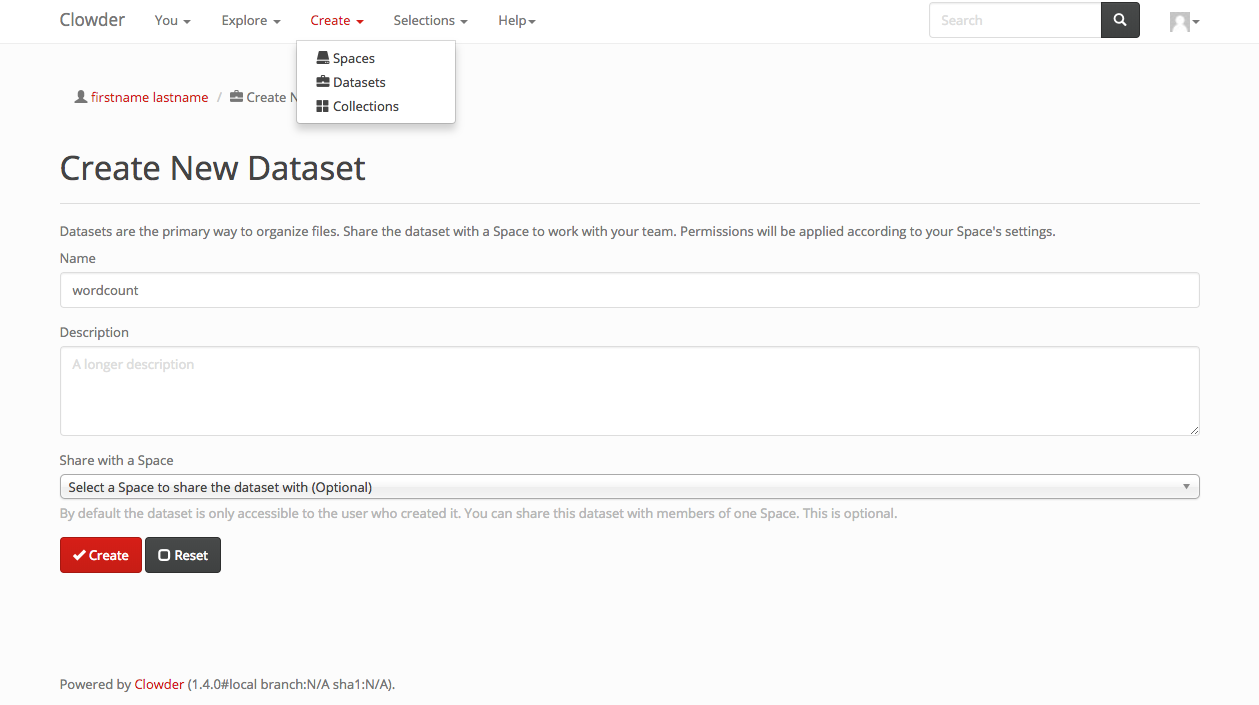
- Open your web browser and go to http://<ip_address>:9000/signup, where <ip_address> needs to be replaced by your computer’s IP address. You can run ifconfig (Mac/Linux) or ipconfig (Windows) command from a terminal window to find your computer’s IP address.
- Once you are in the sign up page, please create an account using your email address as shown in figure above. Click on the "Create Account" after you enter your email address.
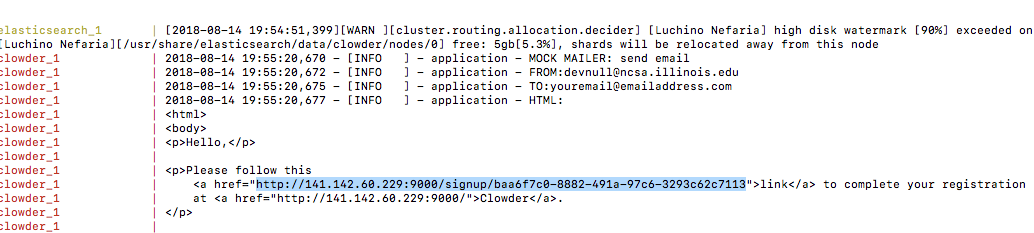
- Now, you need go back to the terminal where you launched Clowder services stack and check the log (for concise presentation, the below screenshot has been partially cropped on left side). You will see a URL (highlighted) of the Sign Up form. Please go to that URL from your web browser. Please note that you are just signing up for an account in your local Clowder instance and the information you provide will remain local to your computer.
- Once you are in the Clowder’s Sign Up page, please fill in the form and click the "Create Account" button.
- Now you can login to your local Clowder instance your email address and password that you set up during the signup process. After you login, you can create a dataset and upload a file for testing. After the extractor processes your file, you will be able to see the generated metadata in the Clowder file page. You will also see some relevant messages in the terminal window where the extractor is running.
- Open your web browser and go to http://<ip_address>:9000/signup, where <ip_address> needs to be replaced by your computer’s IP address. You can run ifconfig (Mac/Linux) or ipconfig (Windows) command from a terminal window to find your computer’s IP address.
To stop the Clowder services stack, you will need to open a terminal client and change to your Clowder docker-compose.yml directory using the cd command before running the command below:
Code Block language bash theme Confluence docker-compose down
- To stop the extractor, you will need to go to the terminal where the extractor is running and press Control + C from keyboard.


Creating a Word Count Extractor Using Simple Extractor Wrapper
Now, following the instructions in the previous section we can create a word count extractor using the Simple Extractor Wrapper. There are three files in this extractor, namely, Dockerfile, extractor_info.json, and wordcount.py. The word count extractor utilizes the Ubuntu built in command wc to find the number of lines, words, and characters in a text or JSON format file. No additional packages are needed by this extractor and hence there are no package installation files (requirements.txt, packages.apt).
- As the first step, let us create an extractor_info.json file that contains the details about the word count extractor as shown in Figure 1. Add this to the source code directory containing the word count Python main program.
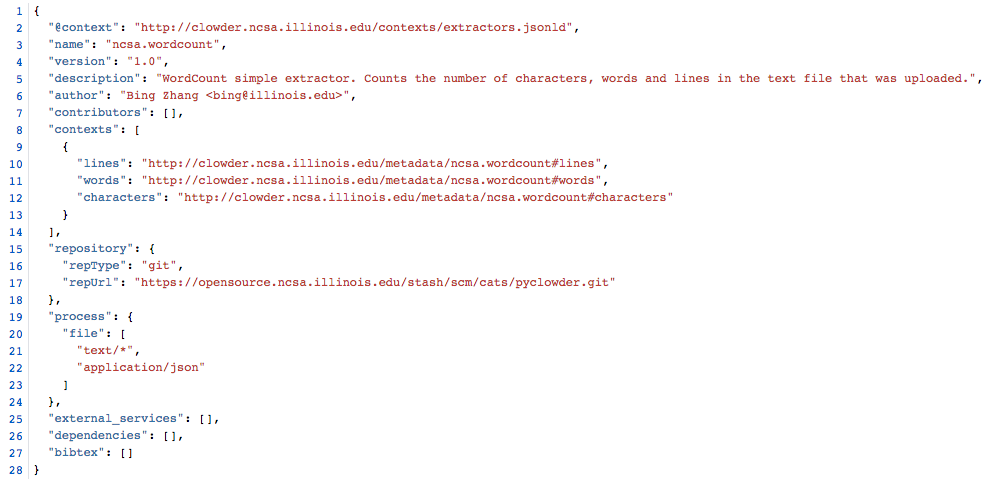
Figure 1. Word count extractor_info.json. In extractor_info.json file, users need to give unique name(e.g., ncsa.wordcount) to the "name" field. In "contexts" field, you can give the semantic definition URL of metadata (e.g., the definition of character in wordcount extractor means the alphabetic letter instead of a person in a movie). In process filed, you can specify the mime type files which is applicable to word count extractor(e.g., wordcount can process any type of text files and JSON files). - Please follow the steps 2 and 3 in the previous section to setup and start the Clowder stack using Docker compose.
- Now, create and save a Dockerfile for the wordcount extractor. Two environment files need to be set in the Dockerfile. EXTRACTION_FUNC is used to store the name of the main function in the Python program and EXTRACTION_MODULE is used to store the name of the Python main program file. In this example we set EXTRACTION_FUNC and EXTRACTION_MODULE to "wordcount". You will later see that the Python file and main function names are the same in this example:
Figure 2. Word count extractor Dockerfile.
Figure 3. Word count program file and main function. The word count program calculates the count of lines, words, and characters and stores it into a "metadata" dictionary object (lines 19 ~ 22), which is then stored in a "result" dictionary object (lines 26 ~ 28) and returned.


Running wordcount.py as regular python code
On the terminal, you can run the wordcount.py as a regular python code, e.g., you can use the below command to run the wordcount.py to extract the counts of lines, words and characters from the input text format file. For example, let us create a text file called poem.txt containing the first stanza of the poem "The Road Not Taken" by Robert Frost:
| No Format |
|---|
"Two roads diverged in a yellow wood,
And sorry I could not travel both
And be one traveler, long I stood
And looked down one as far as I could
To where it bent in the undergrowth;" |
Now we can run the following command to test the word count code:
| Code Block | ||||
|---|---|---|---|---|
| ||||
python -c "import wordcount; print wordcount.wordcount(\"poem.txt\")" |
It will show the output as:
| Code Block | ||||
|---|---|---|---|---|
| ||||
{'metadata': {'lines': 5', 'characters': 182', 'words': '37'}} |
Running wordcount.py as extractor
Word count extractor runs as docker container. Thus, if you want to use word count extractor, please refer to instruction steps to start Clowder services stack and then launch the word count extractor. Then you can submit files from Clowder Web GUI and please follow the steps listed below:
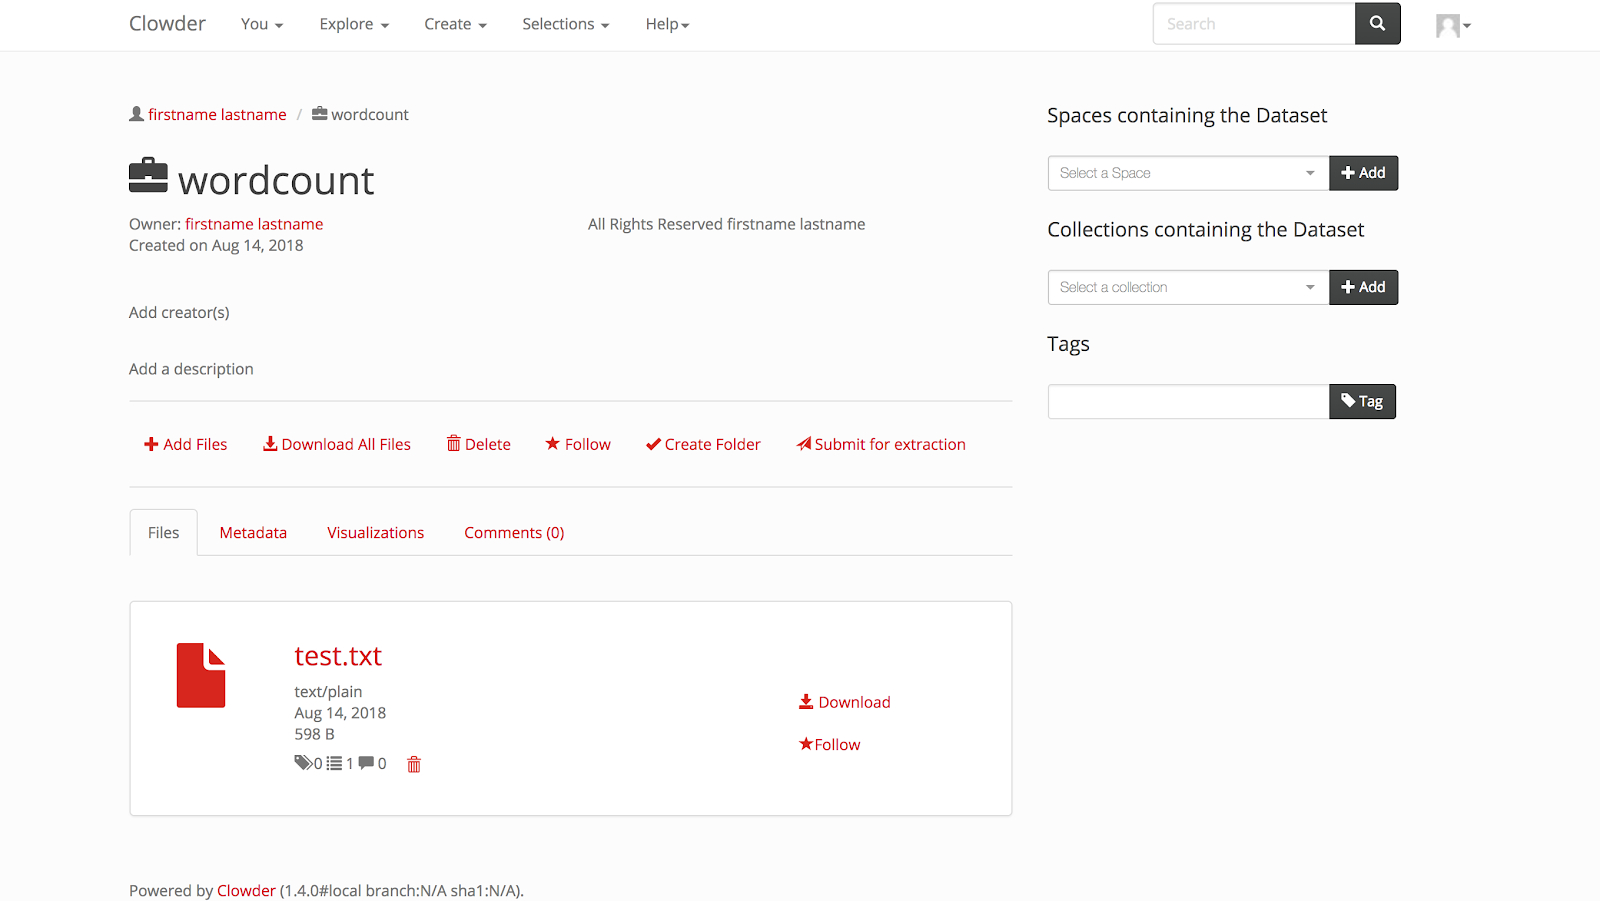
- After logging into Clowder, you need to create a dataset (in this example, we create a dataset and name it wordcount) and upload files into that dataset (you can select multiple files and click "Upload" button to submit to Clowder in a batch).
- After successfully uploading files to Clowder, you can browse the uploaded files by clicking the "View Dataset" button. There is one file named "test.txt" in the "wordcount" dataset. To view the metadata outputs on this uploaded file, please click the "test.txt" link to go to the file page.
- On the file page, you can see the metadata output of word count extractor. Sometimes, the extractor will take some time to upload extracted metadata to Clowder, so you may need to refresh the browser page to view the output metadata.
- Now, you need to go back to the terminal where you launched the word count extractor. On the terminal, you can see the log of the extractor processing the uploading files (for concise presentation, the below screenshot has been partially cropped on left side).
- After logging into Clowder, you need to create a dataset (in this example, we create a dataset and name it wordcount) and upload files into that dataset (you can select multiple files and click "Upload" button to submit to Clowder in a batch).


The source code of the word count extractor created using the simple extractor wrapper can be found here: https://opensource.ncsa.illinois.edu/bitbucket/projects/CATS/repos/pyclowder2/browse/sample-extractors/wordcount-simple-extractor